Paper Carry Bags: The Creative Activity That Pays Off
Everyone needs something to get busy with, relieve the stress, bring their creative self out and, if possible, make some money out of it. The classic example of this is those artists who play violin in public or simply make portraits of the people passing by them and make money out of it.
You have to find something to possess you unless you want to let negativity to do this to you. This blog post is all about getting busy with something artistic as well as of real value in the real world.
Let us talk about paper carry bags for example. People love to buy handmade paper items e.g. greeting cards, gift boxes, and other stuff. This other stuff includes the handmade paper bags that people pay money to get and you can start learning to make those bags and make a fortune out of it.

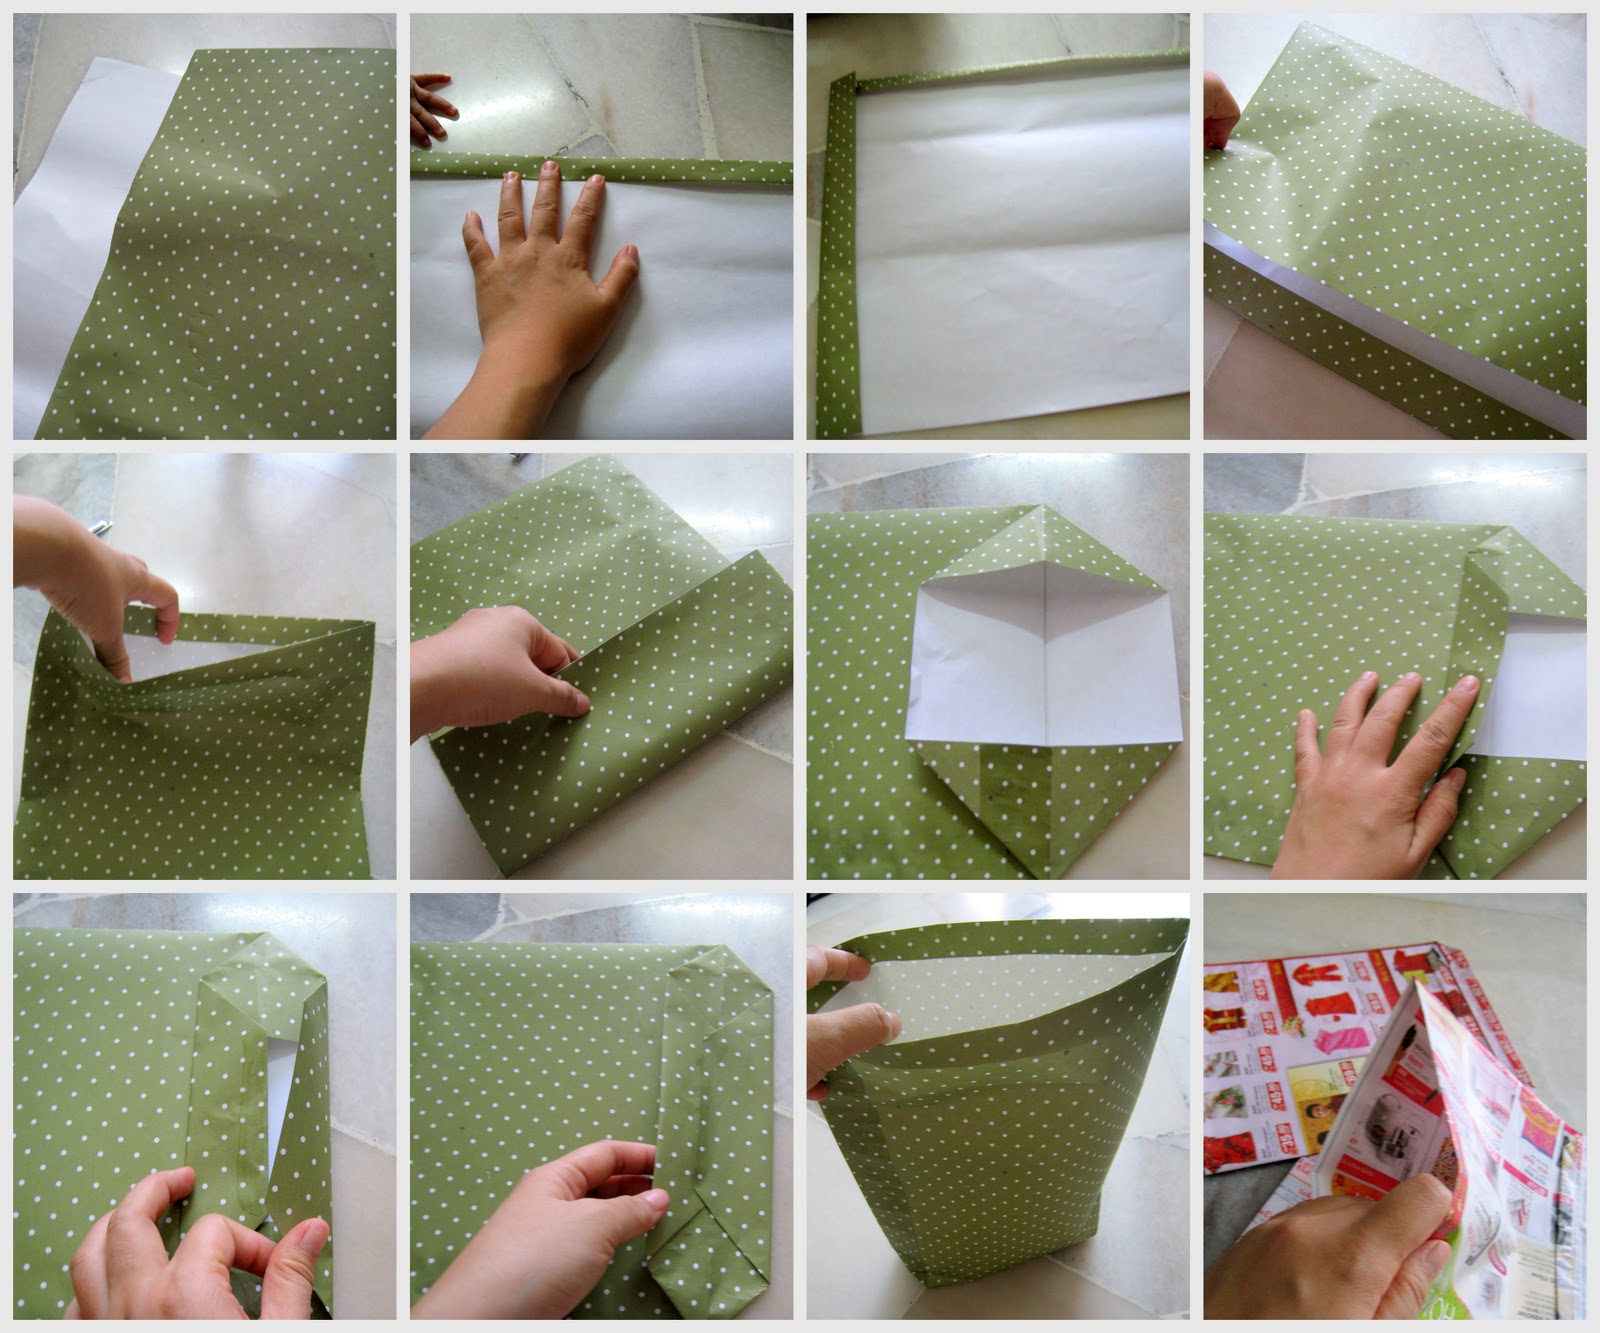
This is a step by step process of making awesome paper carry bags out of paper stock and you will learn to use the given materials in a precise and guided way.
Let us discover:
1. Materials
Here is the list of materials which are used in making of those wholesale paper carry bags that you have been watching in stores and wondering how they are made:
- A paper stock sheet of your favorite base color for paper carry bags
- Some other paper stock sheets of different colors
- Scissors
- Scale
- Glue
- Bone folder

2. Process
Here is the step by step process to make the first perfect paper carry bag. If you perfect this art, you can add a lot of other details to your work, that I will discuss at the end of this blog post:
- Use the scale to take the measurements and decide as to what is going to be the size of your paper bag
- Cut out one big piece of paper stock (one that you intend to use for the base of the paper bag)
- Use the bone folder to score the paper sheet on one of the long sides – it should be scored at half an inch
- Bend the paper from one short side to the other, making sure that you leave a half inch margin
- Press along the curved side to make it look like one piece of cardstock
- Now open the cardstock/paper and apply glue to the half inch scored length (not the margin that you left)
- After the glue is applied, bend that half inch scored length and paste it to the base of the paper stock
- Once glued and pasted perfectly, bend paper stock again to make it half the length of the actual sheet; this you do to turn it from paper stock to paper bag
- Now you will deal with the marine that you left; apply glue to it and bend it over to paste it with the rest of the stock
- Take one open side, bend it for 1 ½ inch and press the sides of the bend to make a boat like a feature
- Apply to the other side as well, and then bring both vertical edges together and glue them together
- This will form the bottom of your paper bag
- Wait for the glue to dry, then turn both sides vertical sides of the paper bag roughly an inch inward, reinforce with the bone folder and then bend them inch outward and repeat the process of reinforcing
- Now slide your hand through the opening of the bag and move sideways to see that the bag is a bit fluffy and open to let any item packed inside it
- Now, go to the bottom, and play with it to turn it into a flat paper bag bottom
- Now get a colored paper sheet to make the handles of your bag
- Cut two half-inch thin and 6 inch long lengths
- Apply glue to both sides of both handles and paste both sides of both handles to the inside of the box on both opening ends
- Press with hand and wait for a few seconds to let the handles have the good grip on the paper stock
Job did! You have made the first paper bag of your life and that too without any mistake, and I bet it looks good. Now let us decorate it:

- Get the colored paper sheets that you chose for the decoration
- Cut out some shapes e.g. heart, star, moon, sunflower or any other flower etc.
- Apply glue to the shapes and paste them proportionately on both sides of the bag
- You can also use colors in contrast; choose two sheets of light and dark colors, cut out the shapes, the dark shape will be small and glued to the big light-colored shape and the big light-colored shape will be glued to the bag
This is it. However, you can easily modify this process. You can also choose to add embellishments like ribbons, laces, and motifs etc. As much expensive as your bag will be, you will be capitalizing on it and the price will go high. This means more income with little-added impact.
